How To Preload The LCP Image In Framer
Introduction
If you’re looking for advanced ways to speed up your Framer website, you’ve come to the right place.
In this tutorial, I’ll show you how to correctly use an LCP preload code override to speed up your website.
This technique is a bit advanced and will require you to add and use a custom code override on your project.
If you’re just starting out with Framer and simply want your website to load quickly, I encourage you to check out this guide on seven native ways to speed up your Framer website.
That guide alone should be enough to allow you to achieve a perfect Core Web Vitals score.
However, if you want to go the extra mile, this post is for you.
But before I show you how to use it, there are a couple of things you need to know and consider.
The Basics Of Preloading
Preloading means instructing the browser to download a resource early in the page lifecycle.
In Layman’s terms, you’re telling the browser to prioritise specific resources because you want them available as soon as possible.
While browsers already do a good job prioritising certain elements, giving them more instructions will ensure the best possible outcome.
To preload a resource, you usually have to add a special HTML element to your page’s tag that looks something like this:
As you can see, you have to specify what kind of resource you want to preload and where the browser can download it.
And while Framer allows you to add custom tags to your page, referencing specific resources is currently (and probably never will be) possible.
However, there’s some good news. Framer already does a fantastic job at preloading the right resources.
It automatically preloads stylesheets and fonts - which is fantastic!
But one thing it doesn’t do is to preload the Largest Contentful Paint image, and here’s where the custom code override comes in.
How To Preload The LCP Image In Framer
1. Find The LCP Image
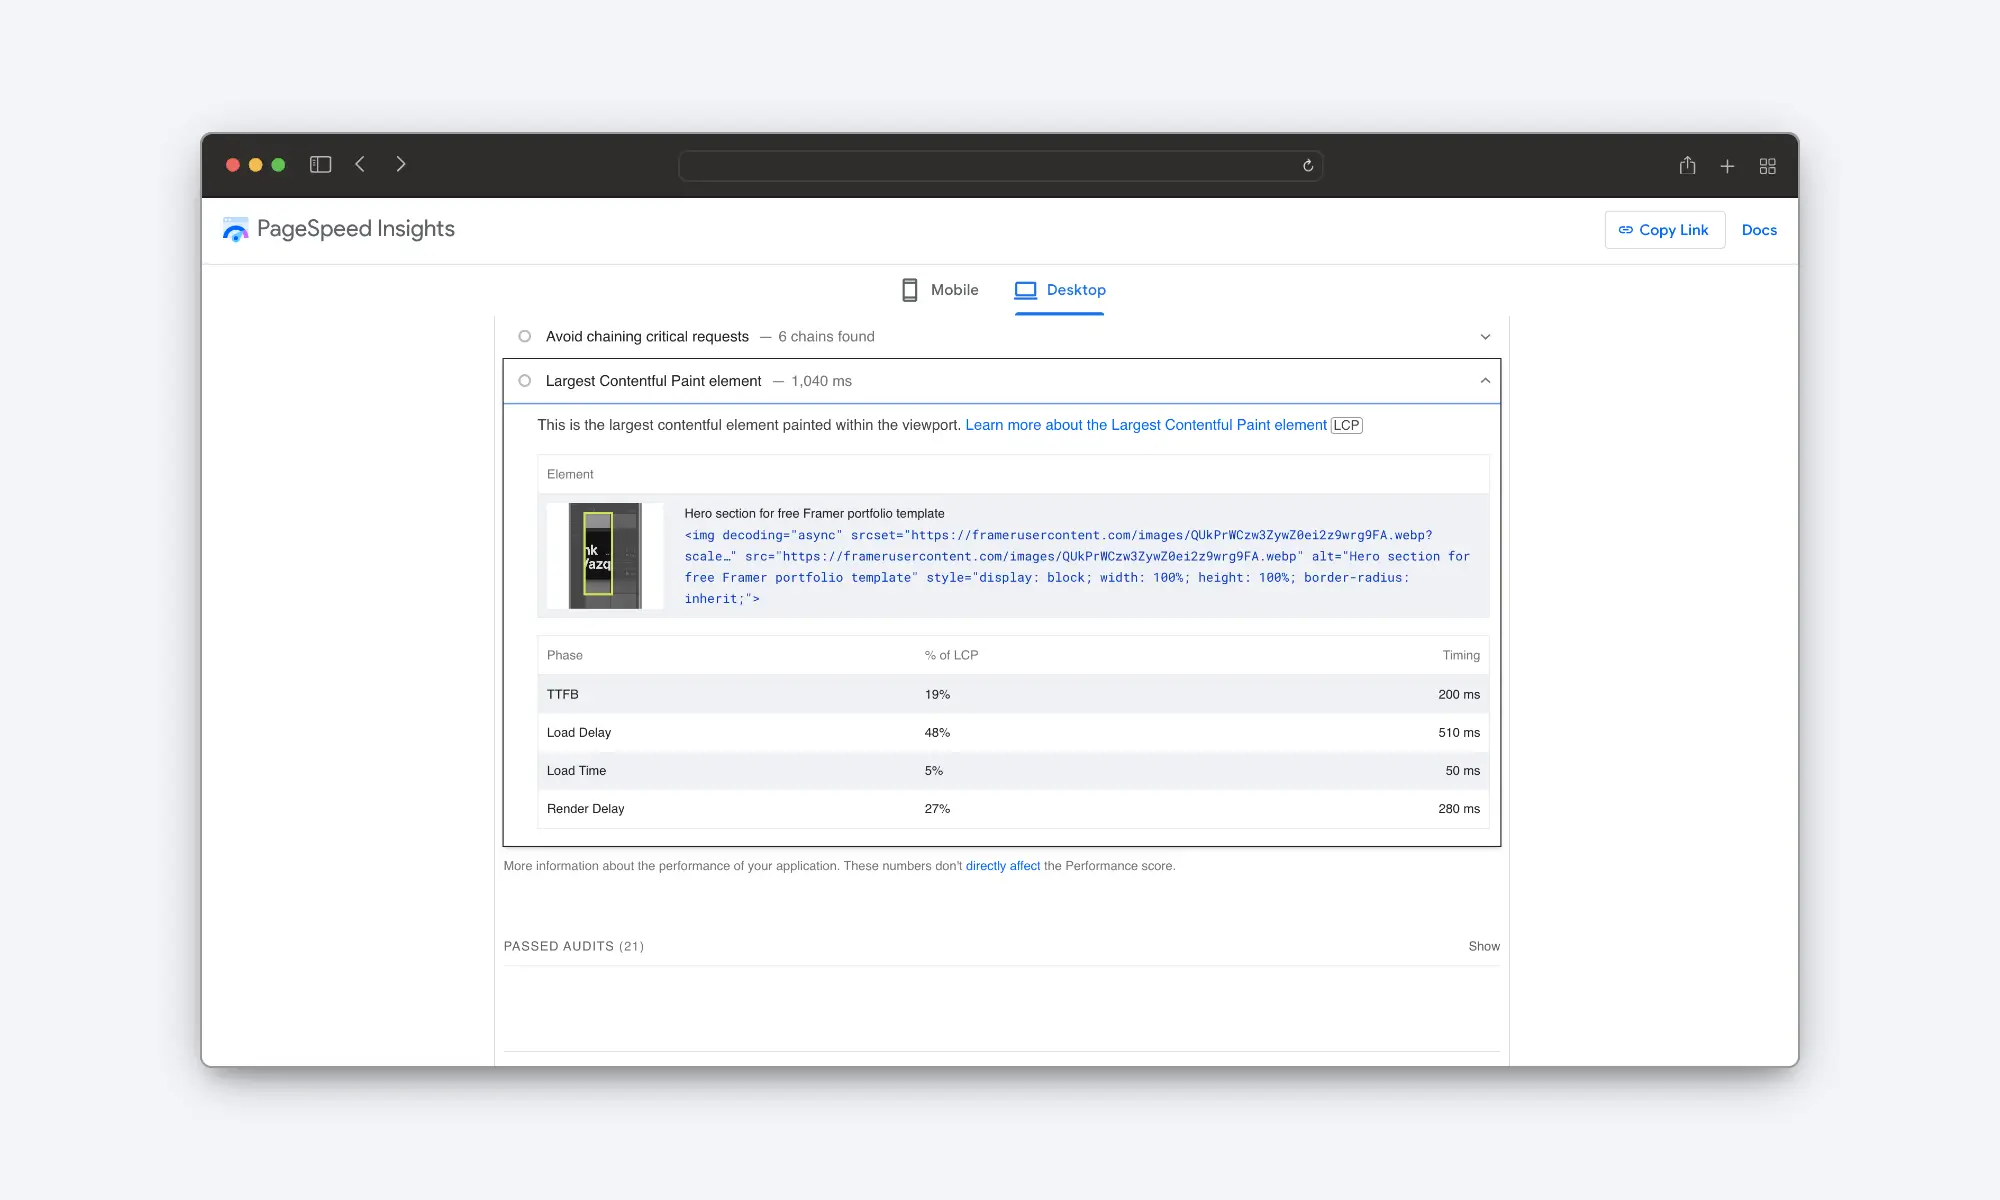
Not every page will have an LCP image, so it’s always best practice to run the page through PageSpeed Insights to check whether that’s the case.
So, get a PageSpeed Insights report for your page and then scroll down to the “DIAGNOSTICS” section.
Once there, expand the “Largest Contentful Paint element” to see what Google considers the LCP element for that page.

If you see an image in there, that’s what you want to target with this code override.
If you don’t see an image, DO NOT use this override on that page - I warned you.
2. Add The Custom Code Override To Your Project
Once you’ve identified the LCP image, it’s time to preload it.
The first thing you’ll need to do is to add the code override to your project.
To do that, create a new override and call it whatever you want.
Then, paste this code into it and save.
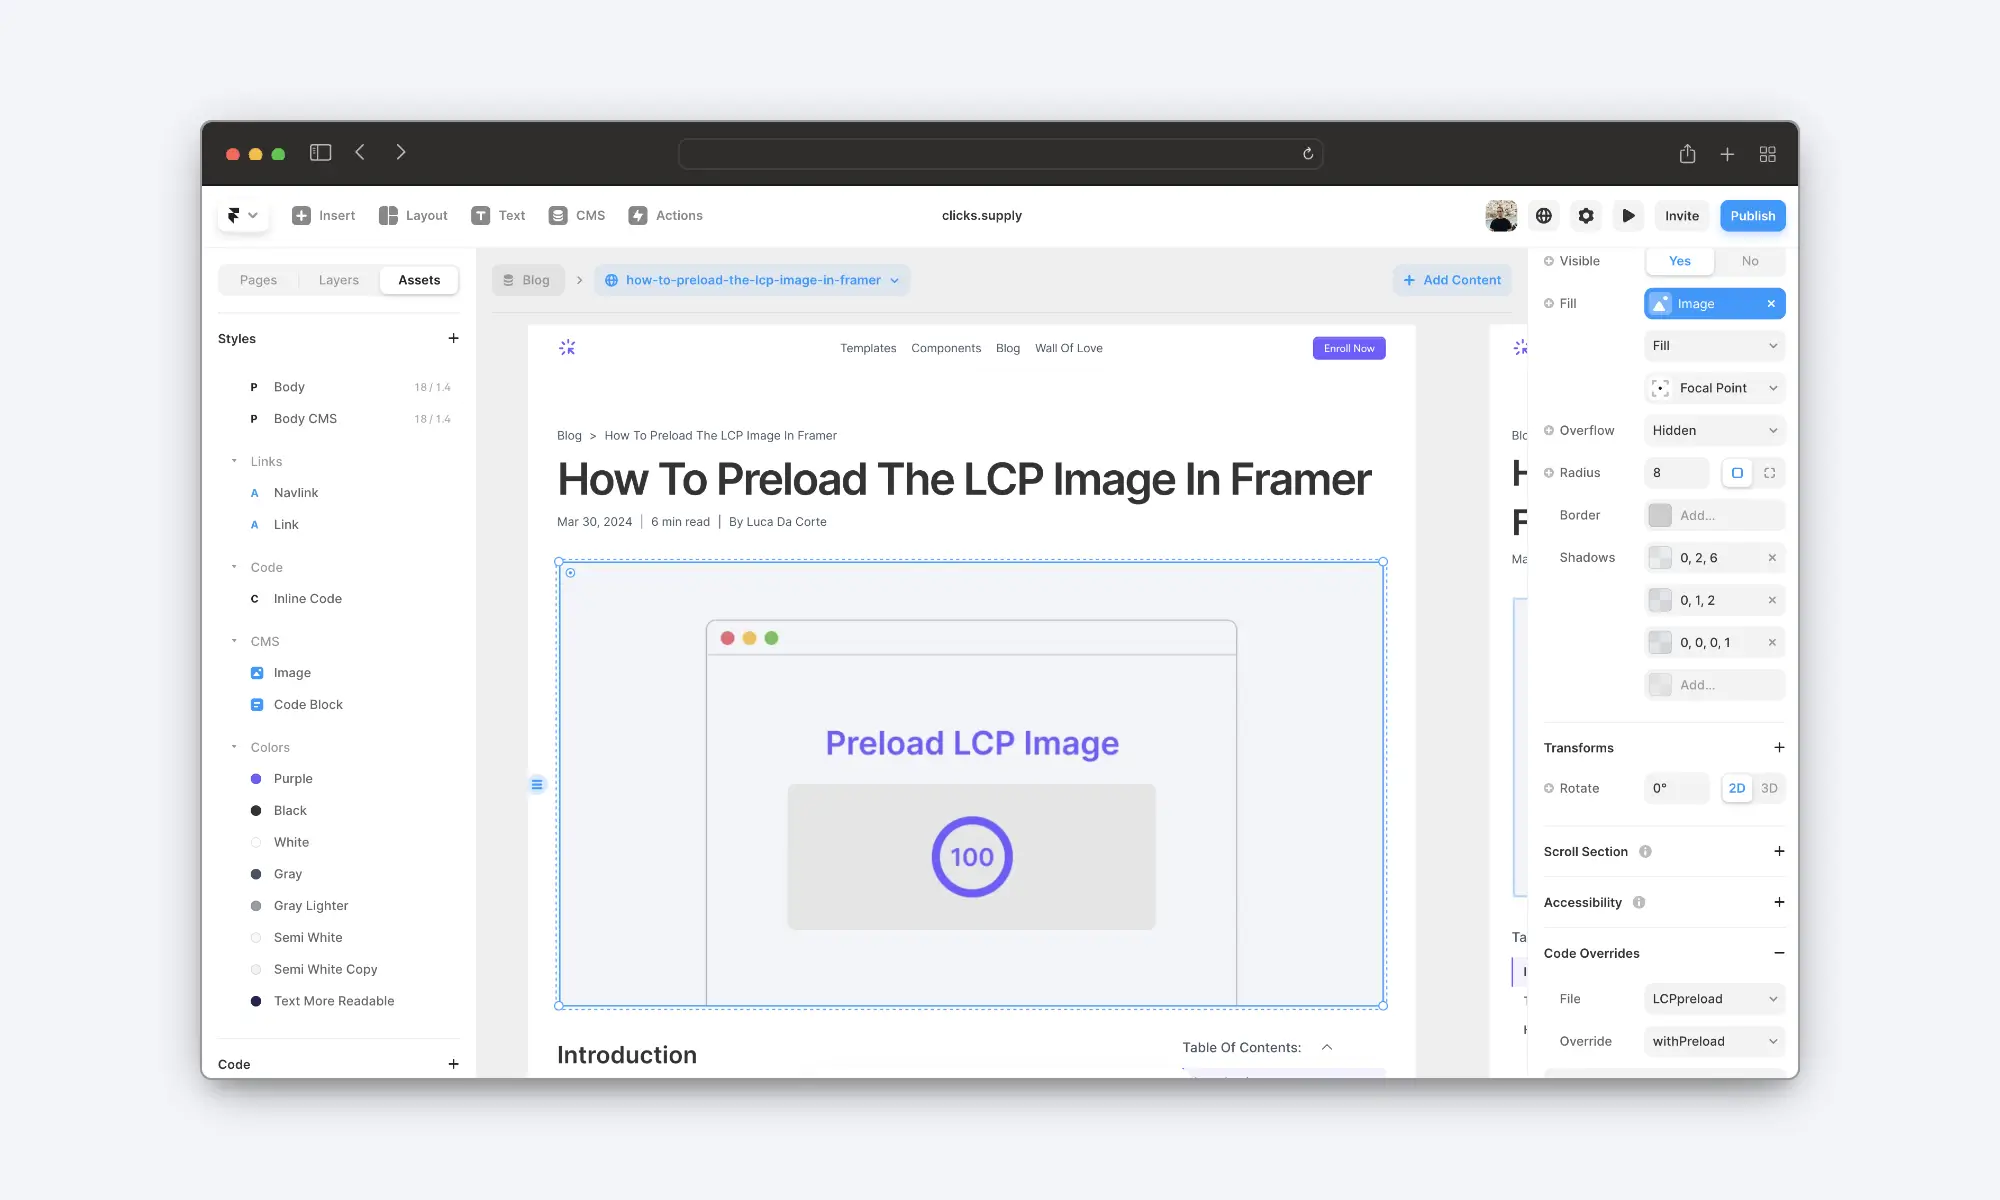
3. Apply The Code Override
Now, go back to the Framer canvas and select the LCP image you previously identified.
Then, use the right-side panel to add the code override you just created.

And voilà! Just publish your website, and you should see a good improvement in your LCP score.
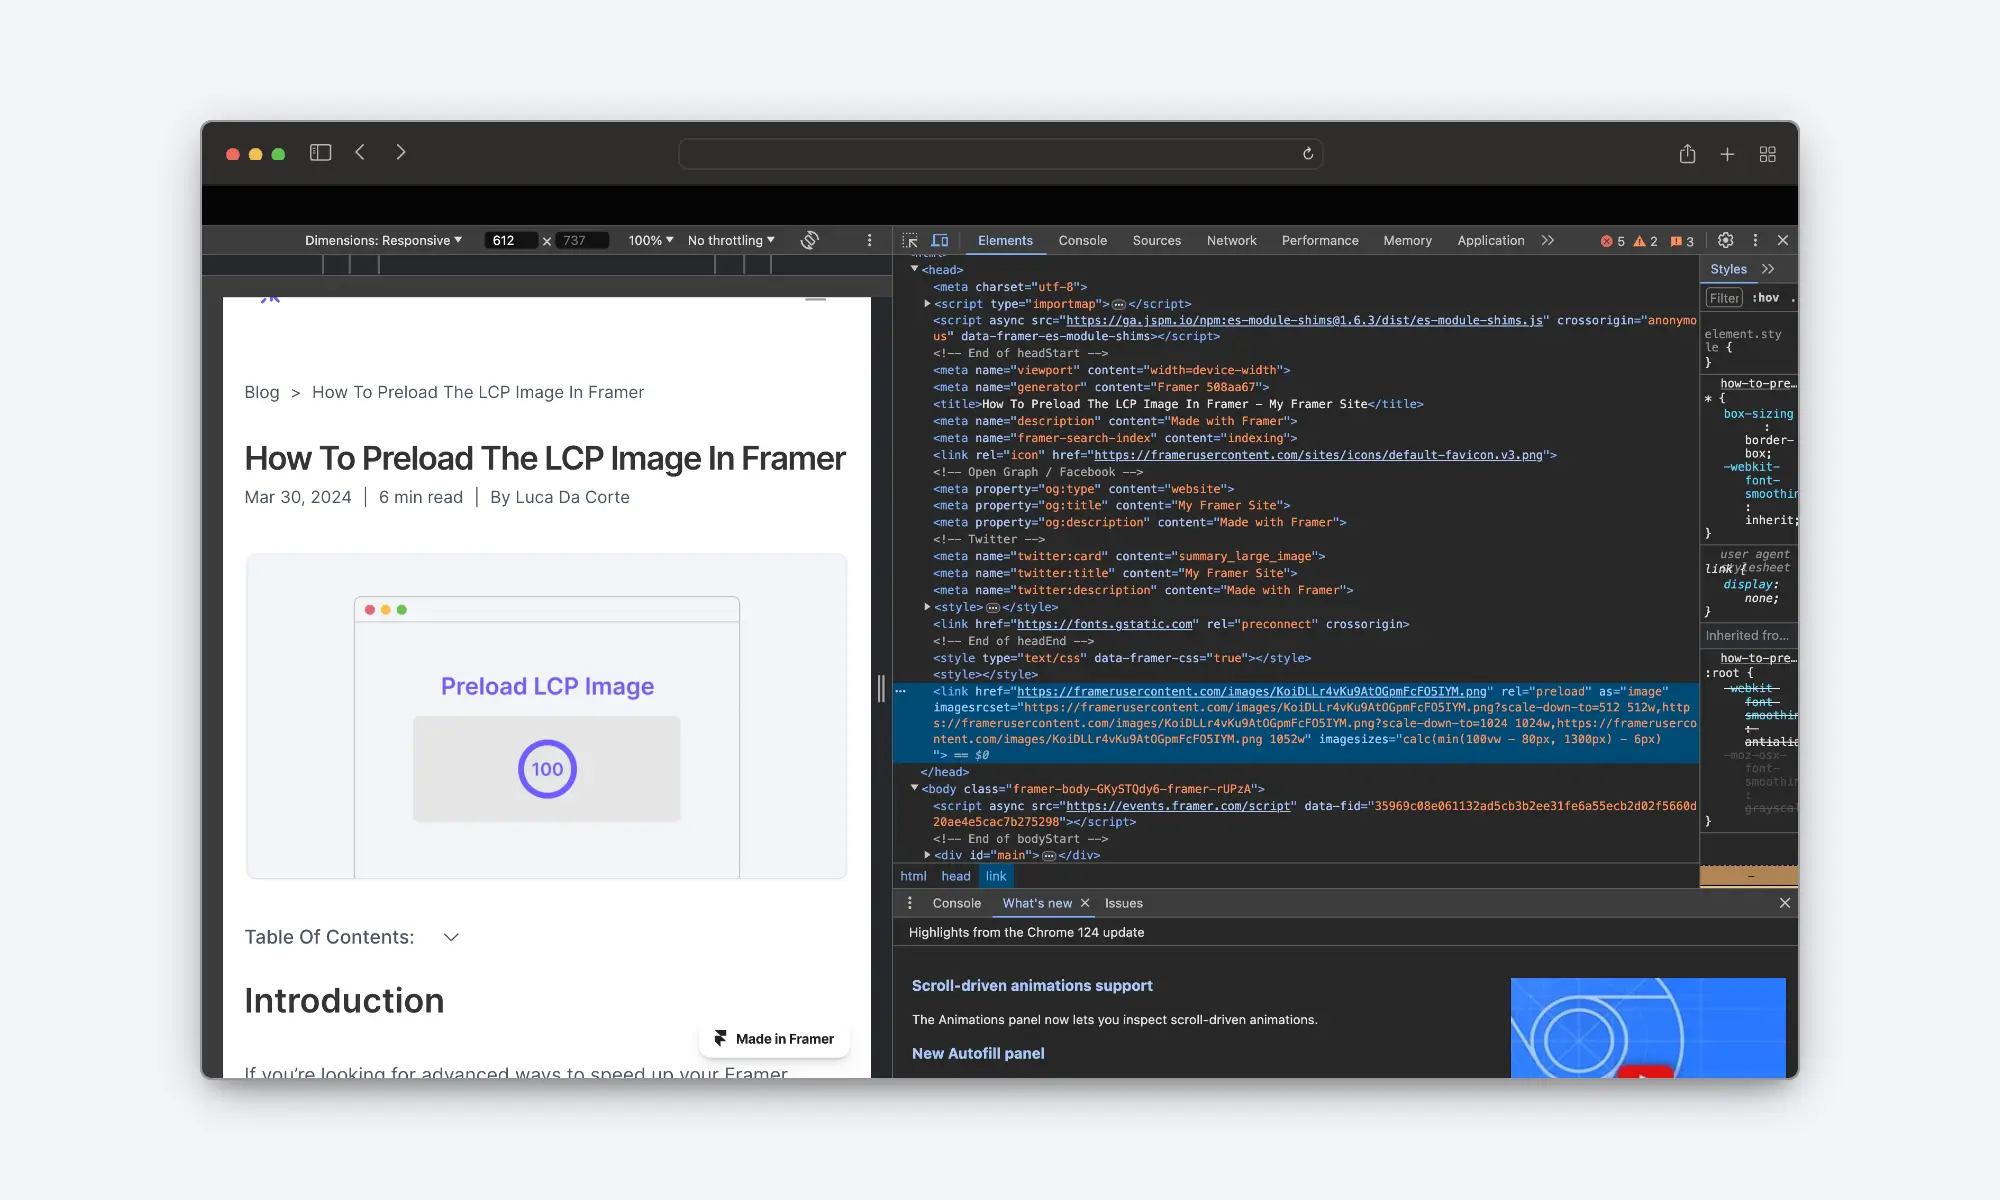
If you want to check whether everything is actually working, here’s how you can do it. (things are about to get a bit technical here)
Open the page in the browser, right-click anywhere on the page, and then select “Inspect”.
On the “elements” panel, open the tag and scroll down till its end. There, just before the closing tag, you should see an instruction that looks like this one:
Here's a screenshot of what you should see:

If you don’t see it, then the code override is not working (or you’re viewing a cached version of the page; try opening it on an incognito window and repeat the process).
Acknowledgements
This code override was developed in collaboration with Noven.
Actually, he did all the development work - I just came up with the idea and marketed the finished override.
If you’ve liked the article, go show him some love on Twitter.
Thanks for reading!
- Luca


